1. Setting Up Ubuntu Virtual Machine#
To make our process as easy as possible to follow, we try to work in a linux envoronment. Here is a guide to installing Ubuntu for you to use going forwards.
Downloads#
Go to ubuntu.com and download the latest iso version.
Then go to virtualbox.org and download the latest version. You may use VMware if you prefer that.
Once Virtual Box is downloaded go through the steps and install it.
Step 1: Create a new Virtual Machine#
Open Virtual Box
Click on “Machine” from the top toolbar, then click on “New”.
Give a name to your virtual machine, then select the folder where you want to store it or keep it default. (Figure 1)
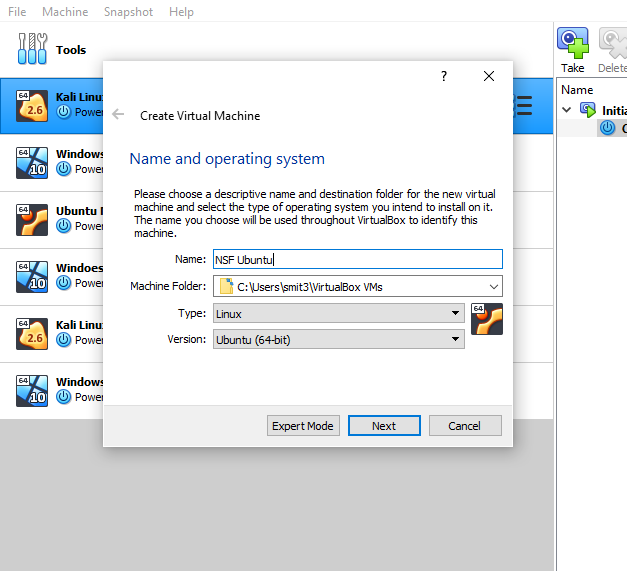
Fig. 1 .#
Allocate Memory size (Minimum: 2000MB, Recommended: 4000MB) (Figure 2)
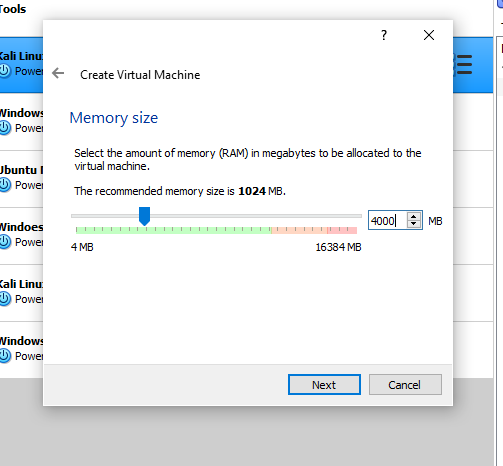
Fig. 2 .#
Select “Create a Virtual Hard Disk”
Select VDI (Virtual Box Disk Image)
Select Dynamically allocated For the size, at least 25GB is recommended
Step 2: Selecting Ubuntu for the VM#
Select your VM on the left side
On the top tab select Settings
Go to System > Processor, change it from 1 to 2 (Figure 3)
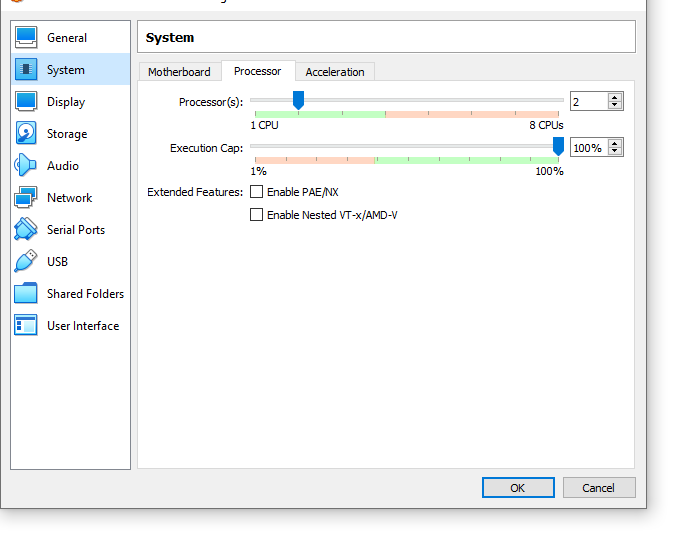
Fig. 3 .#
Now go to Storage and select the “Empty” CD icon (Figure 4)
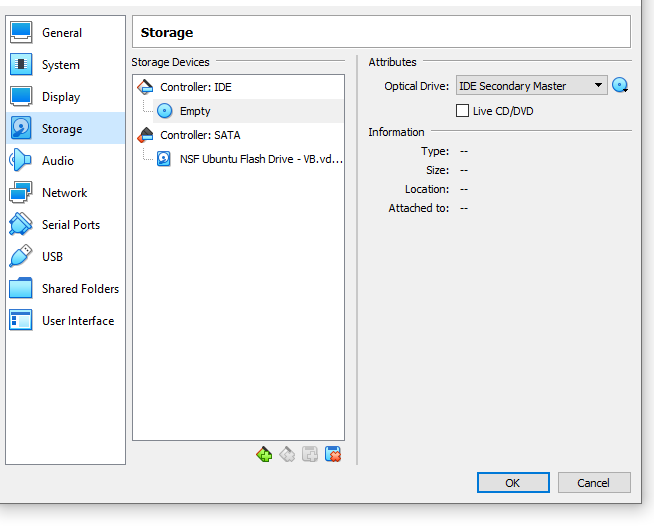
Fig. 4 .#
On the right side, you will see another CD icon next to “IDE Secondary Master,” select it then choose “Choose a disk file” then select the ISO you downloaded earlier. (Figure 5)
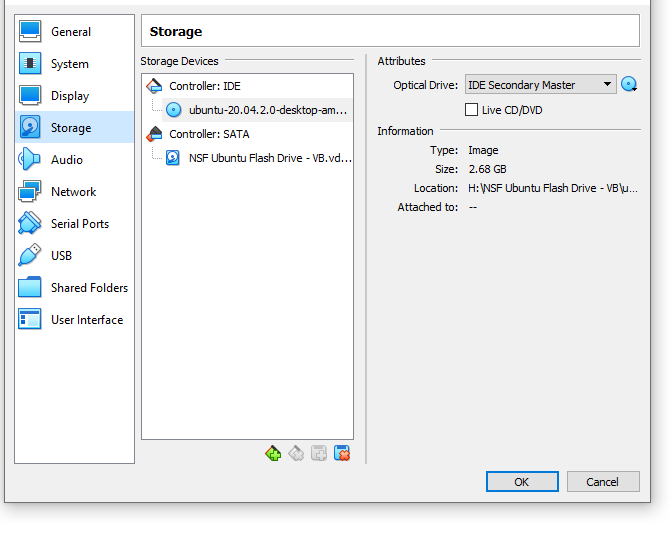
Fig. 5 .#
After that select “OK” then “Start” your VM
Step 3: Installing Ubuntu#
The installation process is pretty self-explanitory. You are going to want to select “Install Ubuntu” on the first screen, then “Install third-party software for graphics …” on the second, then “Install Now”. You will have to fill out a form later, and then you are good to go.
It is recommended that you save a snapshot after Ubuntu is properly installed so you don’t have to keep going through the process.